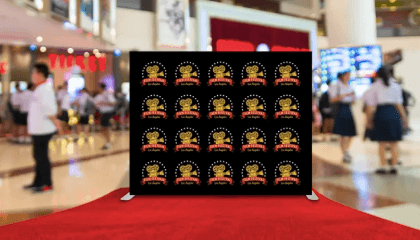
Tips to Choose the Best Step and Repeat Banner: A Complete Guide

The success of your event as well as the exposure of your business may be greatly impacted by the choice of step and repeat banner. Knowing how to pick the best banner becomes more crucial as these multipurpose marketing tools continue to grow in favor. Making well-informed choices about the design along with requirements of your step and repeat banner will guarantee that it fulfills its intended function, whether you’re organizing a community gathering, wedding, or business event. Let’s look at five crucial pointers to help you choose the ideal step and repeat banner for your requirements.
1. Optimal Size and Proportions
The size of the step and repeat banner has to be correctly chosen to become effective. Your banner of choice should be sufficiently big as to be ideal for use as a background, but small enough that it can fit within your venue of interest. Standard heights typically range from 8 to 10 feet, allowing comfortable photography for both standing individuals as well as small groups. The width should be considered based on your expected group sizes – typically ranging from 8 to 12 feet for most events. Remember to account for the venue’s ceiling height alongside any space constraints when selecting your banner dimensions.
When calculating proportions, consider the types of photos that will be taken against your banner. An 8×8 foot banner could work well for individual images, but you’ll need larger measurements for group shots or more complex arrangements. Consider the working distance of the photographer; ideally; the latter should be standing 6-8 ft away from the banner. Also consider the Banner in the context of other event apparatuses and also check for congestion and space that should allow congregational flow of other people without hindering traffic flow.
2. Material Quality and Durability
The look and durability of your banner are greatly influenced by the material quality. High-quality fabric or vinyl materials keep color vibrancy, don’t wrinkle, and take good pictures in a range of lighting situations. Because they reduce glare in photos and produce superior results in a variety of lighting conditions, matte finishes are typically chosen over glossy ones. The fabric should be sufficiently thick to hang without buckling or rippling, guaranteeing a polished look in every picture.
When choosing materials, take into account the intended function of your banner. Invest on more robust materials that can tolerate repeated setup, breakdown, and transportation if you intend to use it for several events. Although they may initially cost more, fabric banners frequently carry more easily and are more wrinkle-resistant than vinyl banners. Because spills and dust are frequent during events, use materials that are simple to maintain and clean. In order to meet venue safety regulations, the material must also be fire resistant.
3. Logo Placement and Pattern Design
Appropriate brand placement and pattern design are critical to the success of your step and repeat banner. To create a balanced, polished look, logos should be uniformly positioned over the banner. Depending on the size of the brand and the total dimensions of the banner, the conventional distance between logos usually falls between 6 and 9 inches. By using this spacing, logos may be seen well in photos without being overpowering or cluttered. When designing, think about utilizing a grid system to keep the pattern’s spacing constant.
For the best visibility in photos, logo size and color choice must be carefully considered. In photographs, logos should be noticeable but not so big as to overpower the topic. Generally speaking, logos should be between 9 and 11 inches in their biggest size. Unless sponsorship agreements specify otherwise, use consistent size when utilizing numerous logos or sponsors.
4. Print Quality and Resolution
Your step and repeat banner’s print quality has the power to create or ruin its polished look. To guarantee that text and logos seem clear and sharp in photos as well as in person, high-resolution printing is crucial. For logos, wherever feasible, use high-resolution vector files so they may be resized without sacrificing quality. For crisp, expert results that will appear fine even in close-up shots, every raster picture should have a minimum resolution of 300 DPI at the final print size.
The accuracy of color is yet another important factor in print quality. Before final manufacturing, ask for color proofs to make sure all brand colors are faithfully captured. If at all feasible, test colors in a variety of lighting situations to get a sense of how changing lighting can impact the look of your printed banner.
5. Hardware and Setup Considerations
Your step and repeat banner’s setup procedures and accompanying gear are equally as crucial as the banner itself. Select a robust frame system that fits the weight and size of your banner. Stands that are retractable or adjustable provide versatility for various settings and setup needs. The hardware should be lightweight enough for convenient setup and transportation, yet sturdy enough to provide stability throughout the event. Think about whether you require a system that is freestanding or one that can be fastened to walls or other objects.
Conclusion
A number of aspects need to be carefully considered when selecting the best step and repeat or retractable banner, ranging from hardware solutions and design features to size and material quality. These five suggestions will help you choose a banner that will benefit your company in the long run in addition to meeting your immediate needs. Keep in mind that a carefully considered step and repeat banner is an investment in the success of your event and the visual presence of your company.


